Example 3 - I2C Password
An example showing how to change the I2C password using the SparkFun ST25DV64KC Arduino Library.
Key Features
- Opening a I2C Security Session using the password
- Changing the I2C password
- Demonstrating how the password can control writing
Changing The Password
Example 2 demonstrated how the I2C password can be used to open a security session, so the tag's settings - like write protection - can be changed.
Remember that:
- Area 1 can always be read. There is no read protection on Area 1
- By default, Area 1 is not write-protected
- We can only change the write protection by opening a security session using the correct password
- The default password is all zeros ( 0x00, 0x00, 0x00, 0x00, 0x00, 0x00, 0x00, 0x00 )
Same as Example 2, this example begins by opening a security session using the default password and enabling write-protection on Area 1. Area 1 can then only be modified if the correct password has entered.
Example 3 then demonstrates how to change the I2C password using writeI2CPassword. As you would expect, we can only change the password
having first entered the correct password to open a security session.
  Serial.println(F("Changing the I2C password to 0x0123456789ABCDEF."));
  uint8_t newPassword[8] = { 0x01, 0x23, 0x45, 0x67, 0x89, 0xAB, 0xCD, 0xEF };
  tag.writeI2CPassword(newPassword);
  Serial.print(F("I2C session is "));
  Serial.println(tag.isI2CSessionOpen() ? "opened." : "closed.");
Attention
The password can be read back from the tag, but only when a security session is open. If you change the password, close the security session and then forget the password, your tag is locked forever. There is no way to change or reset the pasword unless you know the password. If you change it, write it down somewhere!
Like Example 2, Example 3 goes on to demonstrate that by entering the wrong password (all zeros in this case) the memory can not then be changed - because write protection is enabled.
The example cleans up after itself by:
- Re-entering the new password
- Changing the password back to all zeros
- Turning off write protection
- Closing the security session
- Writing zeros to the first 16 memory locations
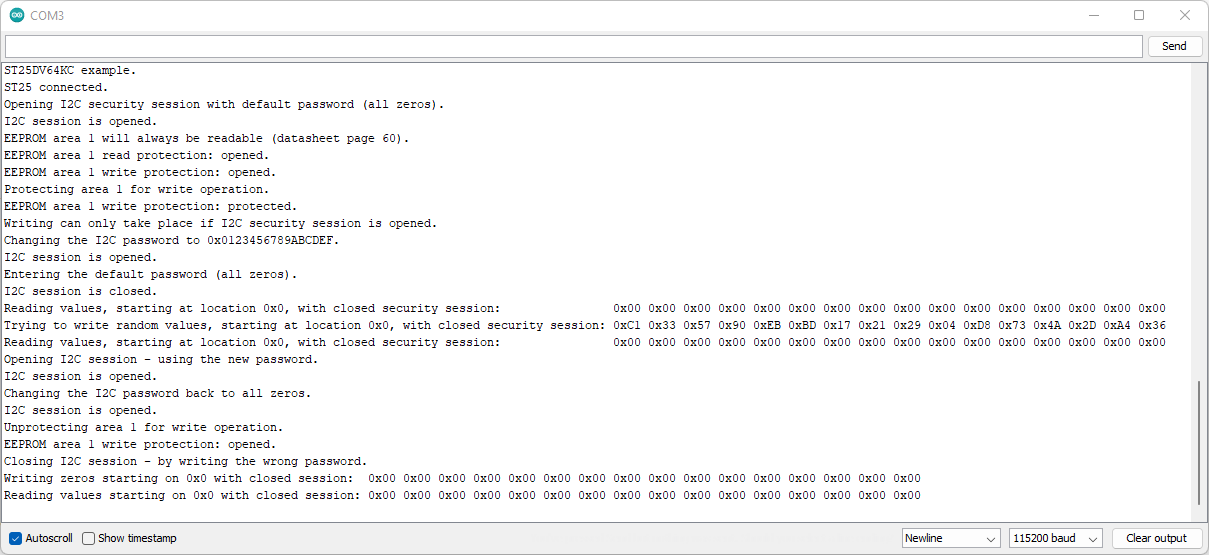
Arduino IDE Serial Monitor output for Example 3. (Click to enlarge)